Snowflake guide
To get set up with Snowflake, there are a few parts you will need. This guide will walk you through the process of getting set up with Snowflake and setting up those parts. There are also a few prerequisites that you will need to have in place before you can get started.
The final result of this guide will be an end to end set up with Snowflake and Quary, including the ability to make changes in Visual Studio Code.
Prerequisites
Before you can get started with Snowflake and Quary, you will need the following:
- A Snowflake account
- Access to the Snowflake UI, ideally with the
ACCOUNTADMINrole - Some data in a Snowflake database, make sure to take a note of the database name and schema name as you will need them later.
Access setup
The set-up can be broken up into a few main parts:
- Database and schema for the transformations to live
- Quary role that has been granted access to the Snowflake database you want to query
- Quary specific warehouse to run Quary queries on
- Quary Security Integration that will be used to authenticate Quary to Snowflake
- Repository set up in GitHub
Database and schema
The first thing you will need to do is create a database and schema for Quary to use. You can do this by running the following SQL in the Snowflake UI:
SET DATABASE_NAME = 'QUARY_DATABASE';
SET SCHEMA_NAME = 'QUARY_SCHEMA';
SET DATABASE_AND_SCHEMA_NAME = concat($DATABASE_NAME, '.', $SCHEMA_NAME);

CREATE DATABASE IDENTIFIER($DATABASE_NAME);

CREATE SCHEMA IDENTIFIER($DATABASE_AND_SCHEMA_NAME);
Now that you have a target database and target schema, you can create a role for Quary to use.
Quary role
Quary needs a role to use to connect to Snowflake. You can create a role with these permissions by running the following SQL in the Snowflake UI:
SET QUARY_ROLE_NAME = 'QUARY_ROLE';

CREATE ROLE Identifier($QUARY_ROLE_NAME);

GRANT USAGE ON DATABASE Identifier($DATABASE_NAME) TO ROLE Identifier($QUARY_ROLE_NAME);
GRANT USAGE ON SCHEMA Identifier($DATABASE_AND_SCHEMA_NAME) TO ROLE Identifier($QUARY_ROLE_NAME);
In addition to the above, you will need to grant the role access to the database you want to query. You can do this by running the following SQL in the Snowflake UI. This assumes full read access to all the tables.
GRANT SELECT ON ALL TABLES IN SCHEMA Identifier($DATABASE_AND_SCHEMA_NAME) TO ROLE Identifier($QUARY_ROLE_NAME);
GRANT SELECT ON FUTURE TABLES IN SCHEMA Identifier($DATABASE_AND_SCHEMA_NAME) TO ROLE Identifier($QUARY_ROLE_NAME);

GRANT SELECT ON ALL VIEWS IN SCHEMA Identifier($DATABASE_AND_SCHEMA_NAME) TO ROLE Identifier($QUARY_ROLE_NAME);
GRANT SELECT ON FUTURE VIEWS IN SCHEMA Identifier($DATABASE_AND_SCHEMA_NAME) TO ROLE Identifier($QUARY_ROLE_NAME);
Now that you have this role set up, you can grant that role to all users who will use the Quary CLI. You can do this by running the following SQL in the Snowflake UI:
GRANT ROLE Identifier($QUARY_ROLE_NAME) TO USER <user_name>;Quary specific warehouse
Quary needs a warehouse to run queries on. Although you could reuse another warehouse, we recommend you create a warehouse with these permissions by running the following SQL in the Snowflake UI. This will ensure that Quary does not interfere with other queries running on the warehouse.
If you want to reuse an existing warehouse, make sure to grant the QUARY_ROLE access to that warehouse.
SET QUARY_WAREHOUSE_NAME = 'QUARY_WAREHOUSE';

CREATE WAREHOUSE Identifier($QUARY_WAREHOUSE_NAME)
  WITH
    WAREHOUSE_SIZE = 'XSMALL'
    WAREHOUSE_TYPE = 'STANDARD'
    AUTO_SUSPEND = 60
    AUTO_RESUME = TRUE
    INITIALLY_SUSPENDED = TRUE;

GRANT USAGE ON WAREHOUSE Identifier($QUARY_WAREHOUSE_NAME) TO ROLE Identifier($QUARY_ROLE_NAME);
Quary Security Integration
The next thing you will need to do is create a security integration for Quary to use to authenticate with Snowflake. You can do this by running the following SQL in the Snowflake UI:
SET QUARY_SECURITY_INTEGRATION = 'QUARY_OAUTH';

CREATE SECURITY INTEGRATION Identifier($QUARY_SECURITY_INTEGRATION)
TYPE = OAUTH
ENABLED=TRUE
OAUTH_CLIENT = CUSTOM
OAUTH_CLIENT_TYPE = 'PUBLIC'
OAUTH_REDIRECT_URI = 'https://www.quary.dev/api/quary-auth/snowflake/callback';
This will create a security integation, run the next query and note the CLIENT_ID & CLIENT_SECRET, these will be used in the onboarding flow/quary.yaml configuration.
SELECT
    PARSE_JSON(OAUTH_SECRETS):OAUTH_CLIENT_ID::VARCHAR AS CLIENT_ID,
    PARSE_JSON(OAUTH_SECRETS):OAUTH_CLIENT_SECRET::VARCHAR AS CLIENT_SECRET
FROM
    (SELECT SYSTEM$SHOW_OAUTH_CLIENT_SECRETS($QUARY_SECURITY_INTEGRATION) AS OAUTH_SECRETS);
Now that you have the security integration, it's time to set up your repository.
Repository
The next thing you will do is create a GitHub repository for your Quary transformations. You can do this by going to GitHub and creating a new repository. You can call it whatever you like, but we recommend something like quary-transformations.
Once you have created the repository, you can open it inside a web Visual Studio Code in your browser by clicking the . on the repository page. This will open a web version of Visual Studio Code in your browser. Or you can visit https://github.dev/ and open the repository from there.
Once you have the repository open, install the Quary extension for Visual Studio Code. You can do this by clicking the extension icon in the left-hand menu and searching for Quary. Once you have found it, click install.
[//] # ( TODO This should be easier. Maybe a button or a page that opens automatically. )
Open the command palette by pressing CMD + SHIFT + P and run the Quary: Initialize Project command. This will initialize the repository with the Quary configuration files.
Once you have initialized the repository, you will need to add the Snowflake security integration to the Quary configuration. You can do this by opening the quary.json file and fill in the requested details.
After having set up the connection, you will be asked to import sources, e.g., bring in the data into your project.
After having brought in your data, you can create your first model by creating a .sql file in the models directory. You can do this by right-clicking on the models directory and selecting New File. You can call the file whatever you like, but we recommend something like my_first_model.sql.
Once you have created the file, you can write your first model. You can do this by writing an SQL query in the file. For example:
SELECT
  *
FROM
  q.<insert imported source>
Once you have written your first model, you can run it by hitting the Documentation button in the top right corner. That model can now be pushed to GitHub.
CI
Creating a GitHub Snowflake user with the right permissions
To get started, we need to create a Snowflake role that will be used to run the CI/CD pipeline. In the Snowflake console, run the following commands:
-- Create CI/CD Role
SET QUARY_CICD_ROLE = 'QUARY_CICD_ROLE';

CREATE ROLE Identifier($QUARY_CICD_ROLE);
-- Grant privileges to Role
GRANT USAGE ON DATABASE Identifier($DATABASE_NAME) TO ROLE Identifier($QUARY_CICD_ROLE);
GRANT ALL PRIVILEGES ON SCHEMA Identifier($DATABASE_AND_SCHEMA_NAME) TO ROLE Identifier($QUARY_CICD_ROLE);
GRANT USAGE ON WAREHOUSE Identifier($QUARY_WAREHOUSE_NAME) TO ROLE Identifier($QUARY_CICD_ROLE);
Next, we need to create a CI/CD user to assume this role, take note of the password as this will be used to set the environment variables.
-- Create CI/CD User
SET QUARY_CICD_USER = 'QUARY_CICD';
-- Once this user has been created, reset the password from the Snowflake console and take note of it.
CREATE USER Identifier($QUARY_CICD_USER);


GRANT ROLE Identifier($QUARY_CICD_ROLE) TO USER Identifier($QUARY_CICD_USER);
Creating the appropriate GitHub secrets
Once you have the Snowflake user created, we need to create the appropriate GitHub secrets. In your GitHub repository, go to Settings > Secrets and create the following secrets:
| Secret Name | Description | Where to find it |
|---|---|---|
| SNOWFLAKE_ACCOUNT | The name of your Snowflake account | Snowflake Console > Account > Account Name |
| SNOWFLAKE_USER | The name of the Snowflake user | The name of the user you created above or if you used the default GITHUB_CI |
| SNOWFLAKE_PWD | The password of the Snowflake user | The password of the user you created above |
| SNOWFLAKE_ROLE | The name of the Snowflake role | The name of the role you created above |
| SNOWFLAKE_WAREHOUSE | The name of the Snowflake warehouse | Snowflake Console > Warehouses > Warehouse Name |
Creating the GitHub PR workflow
Note: The following steps assume your default branch is main. If it is not, you will need to update the workflow to use the correct branch.
Now that we have the appropriate secrets set up, we can create the GitHub workflow that will run the CI/CD pipeline. In your GitHub repository, create a new file at .github/workflows/pr.yml with the following contents:
name: pr-checks
on:
  pull_request:
    branches:
      - main
jobs:
  quary-compile:
    runs-on: ubuntu-latest
    steps:
      - uses: actions/checkout@v4
      - uses: quarylabs/install-quary-cli-action@main
      - run: quary compile
  quary-build-dry-run:
    runs-on: ubuntu-latest
    steps:
      - uses: actions/checkout@v4
      - uses: quarylabs/install-quary-cli-action@main
      - run: quary build -d
        env:
          SNOWSQL_ACCOUNT: ${{ secrets.SNOWSQL_ACCOUNT }}
          SNOWSQL_PWD: ${{ secrets.SNOWSQL_PWD }}
          SNOWSQL_ROLE: ${{ secrets.SNOWSQL_ROLE }}
          SNOWSQL_USER: ${{ secrets.SNOWSQL_USER }}
          SNOWSQL_WAREHOUSE: ${{ secrets.SNOWSQL_WAREHOUSE }}
  quary-test:
    runs-on: ubuntu-latest
    steps:
      - uses: actions/checkout@v4
      - uses: quarylabs/install-quary-cli-action@main
      - run: quary test -s --mode skip
        env:
          SNOWSQL_ACCOUNT: ${{ secrets.SNOWSQL_ACCOUNT }}
          SNOWSQL_PWD: ${{ secrets.SNOWSQL_PWD }}
          SNOWSQL_ROLE: ${{ secrets.SNOWSQL_ROLE }}
          SNOWSQL_USER: ${{ secrets.SNOWSQL_USER }}
          SNOWSQL_WAREHOUSE: ${{ secrets.SNOWSQL_WAREHOUSE }}
[//] # (TODO: Fix the environment variables names and remove those not necessary)
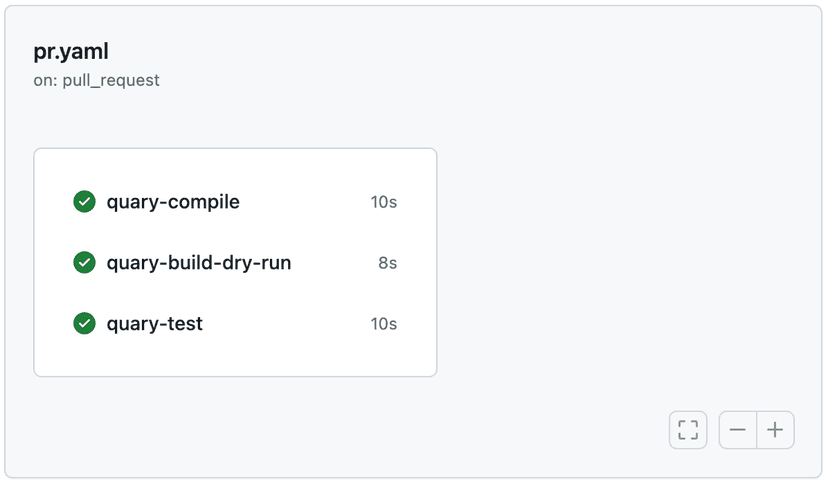
Once that is in place, you can commit and push the changes to your GitHub repository. Once you create a pull request, you should see the workflow run and pass. It should look something like the image below:
Set up the default branch workflow
Now that we have the PR workflow in place, we can set up the workflow that will run on the default branch. This will push the changes to Snowflake and run the tests. In your GitHub repository, create a new file at .github/workflows/main.yml with the following contents:
on:
push:
branches:
- main
jobs:
build:
runs-on: ubuntu-latest
steps:
- uses: actions/checkout@v4
- uses: quarylabs/install-quary-cli-action@main
- run: quary build -c
env:
SNOWSQL_ACCOUNT: ${{ secrets.SNOWSQL_ACCOUNT }}
SNOWSQL_PWD: ${{ secrets.SNOWSQL_PWD }}
SNOWSQL_ROLE: ${{ secrets.SNOWSQL_ROLE }}
SNOWSQL_USER: ${{ secrets.SNOWSQL_USER }}
SNOWSQL_WAREHOUSE: ${{ secrets.SNOWSQL_WAREHOUSE }}
test:
needs: build
runs-on: ubuntu-latest
steps:
- uses: actions/checkout@v4
- uses: quarylabs/install-quary-cli-action@main
- run: quary test
env:
SNOWSQL_ACCOUNT: ${{ secrets.SNOWSQL_ACCOUNT }}
SNOWSQL_PWD: ${{ secrets.SNOWSQL_PWD }}
SNOWSQL_ROLE: ${{ secrets.SNOWSQL_ROLE }}
SNOWSQL_USER: ${{ secrets.SNOWSQL_USER }}
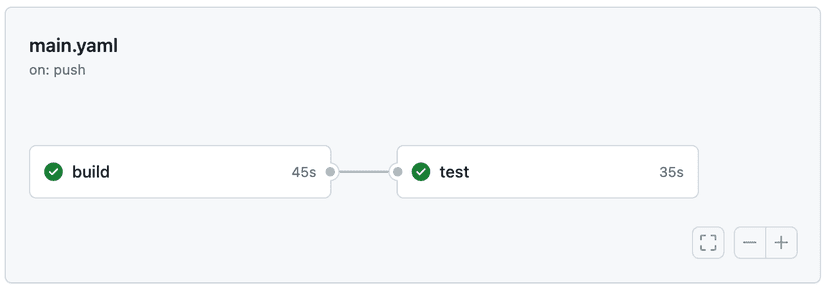
SNOWSQL_WAREHOUSE: ${{ secrets.SNOWSQL_WAREHOUSE }}Once that is in place, you can commit see your merged changes get deployed to Snowflake and tested. It should look something a little like below.
Troubleshooting
Snowflake Setup
If you are having trouble with the Snowflake setup, we recommend you run the following script in your Snowflake account. This runs tests to ensure everything is set up correctly.
-- Variables
SET QUARY_ROLE_NAME = 'QUARY_ROLE';
SET QUARY_WAREHOUSE = 'QUARY_WAREHOUSE';
SET QUARY_DATABASE = 'QUARY_DATABASE';
SET QUARY_SCHEMA = 'QUARY_SCHEMA';

-- Checks
-- Check if the database exists
SELECT 'DATABASE_EXISTS' AS CHECK_TYPE,
       (SELECT CASE WHEN COUNT(*) > 0 THEN 'OK' ELSE 'ERROR' END
        FROM SNOWFLAKE.INFORMATION_SCHEMA.DATABASES
        WHERE DATABASE_NAME = $QUARY_DATABASE) AS STATUS
UNION ALL
-- Check if the schema exists
SELECT 'SCHEMA_EXISTS',
       (SELECT CASE WHEN COUNT(*) > 0 THEN 'OK' ELSE 'ERROR' END
        FROM INFORMATION_SCHEMA.SCHEMATA
        WHERE SCHEMA_NAME = $QUARY_SCHEMA AND CATALOG_NAME = $QUARY_DATABASE)
UNION ALL
-- Check if the role exists
SELECT 'ROLE_EXISTS',
       (SELECT CASE WHEN COUNT(*) > 0 THEN 'OK' ELSE 'ERROR' END
        FROM INFORMATION_SCHEMA.APPLICABLE_ROLES
        WHERE ROLE_NAME = $QUARY_ROLE_NAME);
External Database Permissions
To allow the Quary role to pull data from external databases, you need to grant specific permissions. The following script outlines how to grant these permissions to the QUARY_ROLE. This script assumes that you have an external private database named EXTERNAL_PRIVATE, a schema within this database named SECRET_DATA, and a table named DATA.
-- External Permissions to Private Database Schemas and Tables
SET QUARY_ROLE_NAME = 'QUARY_ROLE';

-- Grant usage permissions on the database and schema
GRANT USAGE ON DATABASE <INSERT_DATABASE> TO ROLE Identifier($QUARY_ROLE_NAME);
GRANT USAGE ON SCHEMA <INSERT_DATABASE>.<INSERT_SCHEMA> TO ROLE Identifier($QUARY_ROLE_NAME);

-- Grant select permissions on all current and future tables and views in the schema
GRANT SELECT ON ALL TABLES IN SCHEMA <INSERT_DATABASE>.<INSERT_SCHEMA> TO ROLE Identifier($QUARY_ROLE_NAME);
GRANT SELECT ON FUTURE TABLES IN SCHEMA <INSERT_DATABASE>.<INSERT_SCHEMA> TO ROLE Identifier($QUARY_ROLE_NAME);

GRANT SELECT ON ALL VIEWS IN SCHEMA <INSERT_DATABASE>.<INSERT_SCHEMA> TO ROLE Identifier($QUARY_ROLE_NAME);
GRANT SELECT ON FUTURE VIEWS IN SCHEMA <INSERT_DATABASE>.<INSERT_SCHEMA> TO ROLE Identifier($QUARY_ROLE_NAME);